
The gentle drumming of raindrops on a metal roof is a sound unlike any other, often bringing back memories of childhoods spent on farms or watching the rain from a covered back porch.
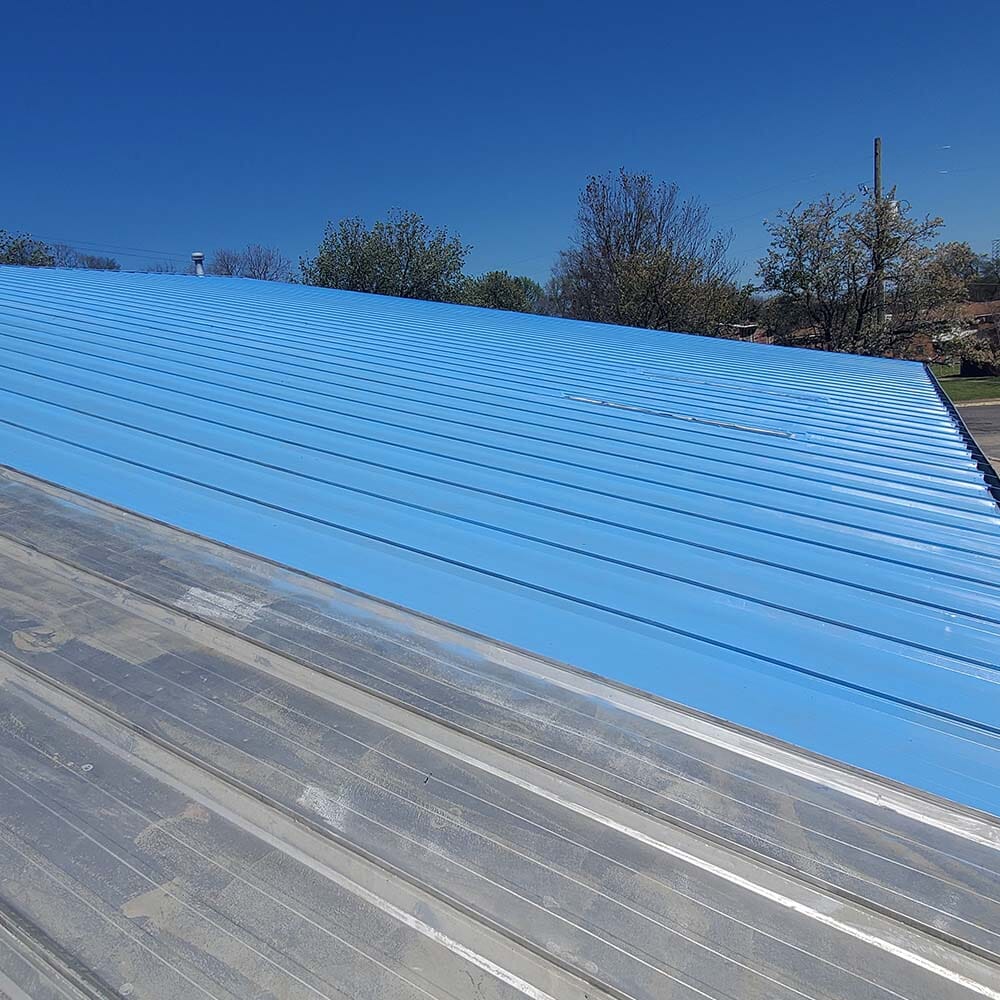
Metal roofs are rising in popularity with residential and commercial property owners alike, due to their long-lasting durability and high rating for energy efficiency. However, no roof is immune to leaks. Flat and corrugated metal roofs are prone to rusting and weakening at the seams over time, and this can cause rainwater to permeate your roof.
If you have a metal roof on your home, don't panic! SEMCO Liquid Membrane is the perfect tool for fixing a metal roof leak. In this piece, we'll walk you through every step, from how to find a leak in a metal roof to how to go about fixing it so that you never have to worry about the potential of water damage.
What Causes Leaks in Your Metal Roof?
Although metal is one of the most durable and long-lasting roof materials, there are opportunities for leaks to occur — especially if the roof is old or poorly maintained. There are other factors to look out for as well.
For example, if you live in a humid climate or one with a lot of rainfall, you should expect your metal roof to rust faster. If you move into a house with a metal roof, there's no guarantee that it was installed with the level of quality that would allow you to reap the benefits that a metal roof is intended to provide.
Here are some of the most common sources of leaks for homeowners with metal roofs:
- Improper installation
- Issues with fasteners
- Panel damage
- Open headwall or flashing
- Missing trim
- Loose gutters or downspouts
- Gaps in seams
- Rust damage
How to Find a Leak in a Metal Roof
If your metal roof is leaking, naturally, you'll want to have it fixed before water damage occurs. The first step is finding the leak. Here are some of the places to look when trying to find the source of the issue:
The Roof Body
A visual inspection may be able to help you detect leaks in the body of your roof, especially if the leaks are major. Check for:
- Holes from weather or debris
- Rust damage
- Missing, loose or overly tight screws
- Shifted metal roofing panels
Connection Points
Seams and joints are common places for leaks to start due to loosening screws or water buildup. Check for:
- Missing sealant or tape
- Loose trim or gaps
- Missing, loose or overly light screws
- Misalignment where panels overlap
Roof Openings
Most roofs are built around other ventilation, piping networks, and other systems (skylights, chimneys, etc.), which create opportunities for leaks to form. Check for:
- Cracked seals on flashing
- Gaps in trim
- Rotting sealant
Roof Edges
The edges of the roofline, including where the roof and gutter are attached, are also prone to leaks and should be part of your inspection. Check for:
- Gutter damage
- Flashing damage
- Rotting sealants
- Cap issues
How to Approach Fixing a Metal Roof Leak
Now that you found the source, it's time to go about fixing the metal roof leak. Before you pick up the phone, call a contractor, and spend thousands on repairs, you should know that SEMCO Liquid Membrane Waterproof Sealant enables you to do the job yourself without compromising quality.
Step 1: Prepare the Roof
The first thing you'll want to do is make sure your roof is 100% ready to treat. Before you do anything, tighten or replace any loose or damaged screws and fasteners. You want your seams to be as tight as possible before sealing the roof for the best results.
Remove any loose debris off the roof. Many people choose to power wash before applying the waterproof sealant to allow the coat to adhere to the roof the best way possible. If you do this, make sure the surface is completely dry before applying tape or sealant.
Step 2: Fortify all Seams
As mentioned, you won't get the best results with loose or open seams on your roof paneling, flashing, or joists. Lay down strips of Fabric Reinforcement to cover cracks and seams.
If the gaps in the seams are large, use a metal-safe polyurethane based caulking on remaining cracks or seams, making sure to smooth the material before moving on to the next step.
Finally, apply Fabric Reinforcement around vents, flashing and protrusions, smoothing it tightly down before moving onto the next step.
How to apply the Fabric Reinforcement :
- First apply a generous coat of SEMCO Liquid Membrane on the areas where the Fabric Reinforcement will be applied to
- While the coat is still wet, apply the Fabric Reinforcement and press it flat
- Any excess coating that comes from underneath the Fabric Reinforcement, spread it evenly with a brush or roller
- After 10-15 minutes apply a thin coat of SEMCO Liquid Membrane over the Fabric Reinforcement to embed it.
Step 3: Apply Liquid Rubber Sealant
Now you're ready to seal your roof and prevent leaks! Using a brush, roller or heavy-duty airless sprayer, apply SEMCO Liquid Membrane Waterproof Sealant in an even coat over the entire roof. You need to apply multiple coats, so make sure you're letting the prior coat dry completely first.
You will need a minimum total thickness of 30-40 mil total thickness in order to waterproof.
Enhance the Impact of Your Roof Sealant
SEMCO Liquid Membrane waterproof roof sealants are one of the top-rated products designed to help you repair existing leaks and prevent new ones from getting the chance to form. There are, however, some steps you can take to increase the effectiveness of your project:
- Use Fabric Reinforcement, the same tape you used on the roof seams, to patch holes and cracks before applying sealant.
- Use a water-based rust primer for areas of significant rust, preventing further rot and damage to the surface of the roof.
- Be sure to apply sealant in the best environmental conditions. It shouldn't be exposed to heavy wind, rain, or excessive heat or sunlight while it's drying. Try to find a day to apply where it's above 50 F and dry.
- On corrugated metal roofs always calculate an addition 25-30% additional to your surface area as it is not a flat surface. This will avoid running out of materials during the application.
- Avoid any rain 3-4 days after the application in order for product to cure.